
There is nothing better than a freshly baked cookie and a cold glass of milk. Well, unless it is sitting at your grandmother’s table after a long day of playing outside…. These cookies bring back those memories for me, and I am sure they will for you, too. My mother and I made these all the time when I was younger. Looking back, I think these were my favorite cookies by far. On Fridays after school, we would pull out the ingredients and bake a fresh batch. They wouldn’t last all week, so I always looked forward to Fridays.
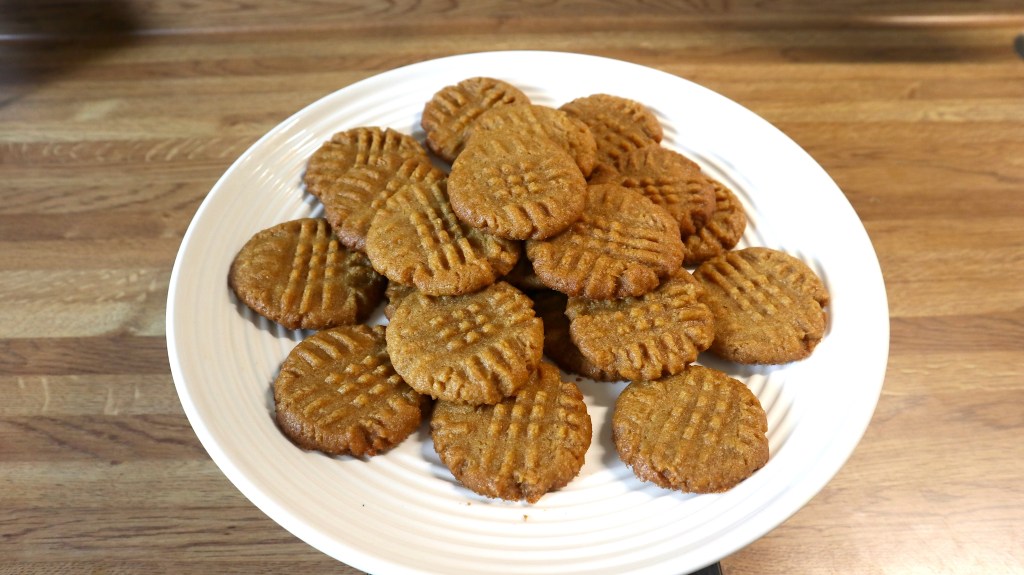
These 3-ingredient peanut butter cookies are just like Grandma made. They are soft and chewy on the inside with that wonderful crisp outside. Remember to add the nostalgic cross-hatch pattern to the top when making these. I keep these in a cookie jar on the counter whenever I make them. My grandma had the cutest cookie jar that she kept cookies in. Sometimes she would put leftover biscuits in there so we would have a quick snack while playing. I still remember what it looked like. It was a blue tin with a little cow on one side and cookies on the other. So many memories.
Anyway, enough of that. Let’s get to making some cookies.
INGREDIENTS:
1 C. Peanut Butter (see notes)
1 C. Sugar
1 egg
DIRECTIONS:
- Preheat the oven to 350*. Line 2 baking sheets with a silicone mat or parchment paper.
- In a bowl, combine the peanut butter and sugar. Using a wooden spoon, beat the peanut butter and sugar together until well combined. About 1 to 2 minutes.
- Add the egg and mix well to incorporate the egg.
- Using a tablespoon or a small ice cream scoop, scoop out some of the dough. I use a 1 tbsp ice cream scoop. Roll the dough into a ball and place it on the baking sheet.
- Once you get all of the dough rolled out, grab a fork and gently press down onto the dough to make an indentation. Press the fork in the oposite direction to make a cross-hatch design. Do not press down all the way, or else the cookies will be too thin.
- Bake for 7 to 8 minutes for a chewier texture. Bake for 8 to 10 minutes for a more crisp texture.
- Remove them from the oven and let them cool in the pan for about 30 minutes. They are soft when they first come out of the oven, so you have to let them cool down. Once they are cool enough, you can transfer them to a cooling rack.
- I like to use Jiff or skippy Peanut butter, but you can use any kind of Nut butter you like. I don’t recommend using natural peanut butter bc they don’t hold their shape and they just don’t turn out right. If you prefer to use natural PB, then try adding a bit of flour (not too much) to the dough. I’ve not tried this, so experiment at your own risk. lol.
- If you want a more crunch to your cookie, try using a crunchy peanut butter. I do this on occasion if I have crunchy peanut butter.
- This recipe is not my recipe. This is a vintage-style recipe that my grandmother made. My mother made these out of an old “Calling all cooks Red label” cook book. These vintage-style cookies never go out of style because they are so easy and good. Many families made these exact cookies for decades so give them a try if you’ve never made them or had them before.
- Now, when it comes to sugar, I have tried these and they have turned out well for me. They vary in flavor and texture, so give each one a try to see which one you enjoy. ( Brown sugar, Granulated white sugar, and Raw cane sugar) If you use a sugar substitute, please read the label to see if it is cup for cup and measure accordingly.
- ENJOY!

