
My family and I love fry bread. It is something that I had on a regular basis growing up. Being Native (Tsalagi/Iroquoian/Cherokee) this is the bread that was primarily made in our home… well besides cornbread, flatbread, and loaf bread… It was easier to make and it was just as good and not to mention very versatile. I typically make fry bread for Indian tacos but you can make them as a side to any dish especially soups, stews, or chili.
This bread is called fry bread because of the way it was made and is still made today by a lot of Natives. I sometimes grill it on my grill pan if I am not feeling the heaviness of it being fried but, we mainly fry it. However you make it, it is delicious. Oh! and BTW you can also add things to the dough like herbs, spices, and garlic and fry or grill it that way. It adds a ton of flavor and is equally as delicious.
Now, I am not going to go on a tangent on who, where, why, and how on all things fry bread. There are tons of information on “google” if you are interested in learning a bit more about fry bread. I am just going to share with you how we make it. This recipe that I am sharing with you can be halved or tripled to make it more or less to fit your family. I was trying to hold out on sharing this recipe because it just means so much to me. I finally decided to share it because why not share more of my heritage with all of you. The “Native” foods we enjoy are so close to my heart because it is part of my heritage and what better way to remember those who passed than to share our style of food and lifestyle. Right?
Anyway… Let’s get started. Here we go.
INGREDIENTS:
4 cups all-purpose flour
1 tsp kosher salt
2 tbsp baking powder
3 tbsp neutral oil or Crisco (melted)
1 1/2 to 2 cups room temperature water
4 tbsp butter – melted and cooled
Oil for frying – I use vegetable oil or Crisco
DIRECTIONS:
- In a bowl combine the flour, salt, and baking powder. Whisk until combined well.
- Add the oil and some water to make a dough. Mix with your hands. Add more water if needed but not too much because you want the dough to hold its shape. The dough should be soft and slightly tacky. Cover the dough with a towel and let rest for 30 minutes or up to 2 hours.
- Pour over the melted and cooled butter and knead the dough until well combined.
- Pinch or cut the dough into 12 pieces. Shape each piece into a ball shape. Set aside.
- On a floured surface or a silicone mat. Roll each ball into a flat disk shape. It can be as thick or thin as you like. I typically make mine about 1/4 to1/8 of an inch. It just depends on what size fry bread you want. Place each one on a plate and set aside while you heat up some oil.
- In a large pan over medium heat, add a bit of oil. I typically add about 1/4 inch of oil. Let it heat up.
- When the pan and oil are both hot, carefully add one to two pieces of dough and fry until golden on each side.
- Remove them to a paper towel-lined plate to drain. Keep them in a Ziplock bag in the fridge if not consumed on the day you make them.
- As mentioned above keep the fry bread in a ziplock bag in the fridge for up to 1 week.
- Best if eaten the day you make them.
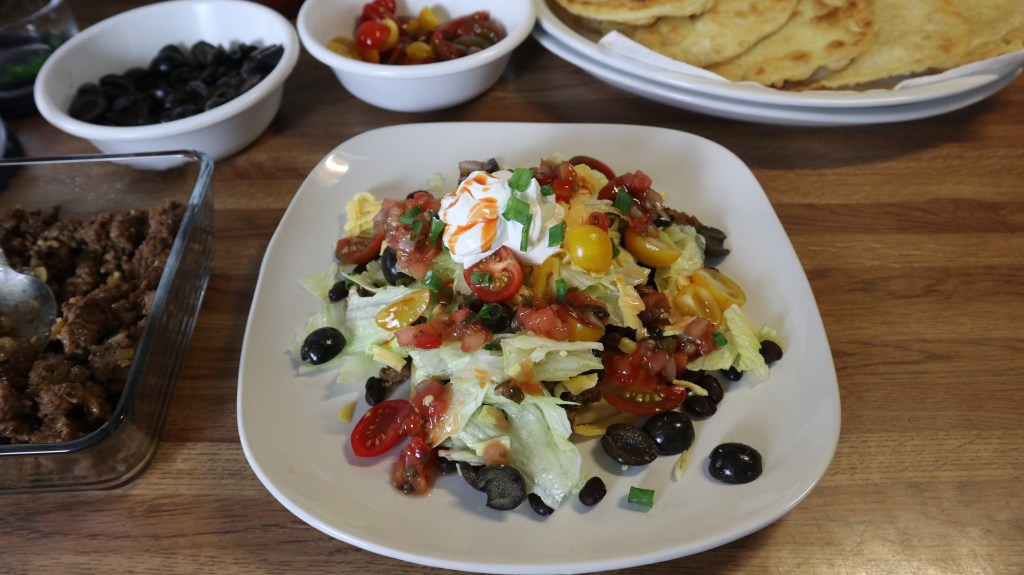
- Serve with tacos, soups, stews, and chilis, or as a side dish to any meal.
- Bump up the flavor with herbs, spices, or garlic.
- Want a sweet treat? Brush some melted butter over the fry bread after it’s cooked and then sprinkle over some cinnamon and sugar on all sides. Add some ice cream and your favorite toppings for a tasty sweet dessert.
- NO PICTURE IS INCLUDED. you can check out my Youtube channel on how to make them if needed. The link is in my social media link on the home page.


I lived in New Mexico and we would always pass by this place that was selling fry bread. We never stopped but always thought we should have. The tacos look yummy tho..
LikeLiked by 1 person
Thank you. They are really simply delicious. If you ever get the chance to give them a try please do. They go well with not only tacos but soups and stews as well. They are great for dunking in the soups.
LikeLiked by 1 person